Monday, September 29, 2014

It's time to 'Square Up'.

This morning I was going through my early routine of checking in on the rest of the Facebook world and stumbled past a post that caught my eye. Since this was posted in the Traditional Hot Rods group and I happen to be a small business that uses the Square Reader device as a convenience to my customers at shows, I thought it was worth a look.

The only reason I use the Square Reader is for the convenience to others, not for me. I used to be a cash only business and it worked out only so well for shows. It would come time to close on a transaction and I would give the customer the total amount due to me (usually about $20 or less) and out comes a piece of plastic from their wallets. This brought on an awkward point where I'd hoped somewhere else in that wallet were some greenbacks so I didn't loose my customer. Sometimes it was true and other times I would get complaints that the customer couldn't use their magic piece of plastic everywhere they went. So I got on the Square Reader bandwagon (by customer request).

I like to focus my time and energy in the creation of artworks, not bookkeeping or doing all the other parts of business I need to do on a daily, weekly, monthly or annual basis. My goal is to spend a minimum of 40 hours a week on the creation side and only around 10 hours a week on all the other parts of business including correspondence, invoicing, running errands, ordering supplies, doing research, balancing a budget and accounting. Everything I listed after art is anti-art from my viewpoint. The truth of the matter is it's about a 60/40 split of time between creation and accounting. Since I'm a one man band, I need to keep on top of all aspects. Some will automatically think:"hire an accountant" but when I would need to significantly increase my price point on all of my products and services, I don't know that they would be okay with the new prices if I did.

I don't sell guns, parts for guns, ammo or even tobacco products so in general I wouldn't think twice about a post like this until customers attempt a potential boycott to my business based on payment options.  Though I don't think it's fair to punish a small time business guy who creates art for a living, if you feel this strongly about your second amendment rights being infracted, then I understand and will also grant you the right to use a second payment option (and my personal favorite) CASH!

If people came to events and shows and prepared to have more cash on hand, this wouldn't be an issue. The Square Reader as well as Paypal create extra work for me in the end, and as I mentioned, I'd rather focus on the art than the accounting.

Problem solved patrons and patriots: Bring more cash and we all win.

Monday, September 22, 2014

Say it, don’t Spray it: SprayBombing!


In the past year I’ve had some pretty fun adventures in riding. Part of riding is figuring out what works for you and your limitations. Some people choose not to wear a helmet and I’m simply not one of them; I have too much to live for not to pop one on. After wearing a black helmet the majority of this year I realized how much your noodle can cook as the color black tends to absorb heat where lighter colors will reflect. I saw an episode of Mythbusters where they did an experiment with light vs dark color vehicles and took the internal heat and if memory serves, there was at least a 5 degree difference between the two. This is the same for your head in a helmet. Being a pretty white guy, I burn easy in the sun. I often joke about ‘my people” living in caves because they were afraid of the sun. No joke, last year my nose completely peeled off in 4 days of riding in the elements to the point it was bleeding. Overheating is serious issue with motorcycling, but so is proper riding gear.

One project I wanted to tackle for fun and some experience was painting a motorcycle helmet. The overall goal was to have a primarily white helmet. I have a couple I switch between, but they are all dark because when you are making your selection of color you often think about how cool black is over any other color, until the sun is beating down on you!

When you think about spray paint you don’t often expect to get good results. Its the kind of projects you drag out to the backyard and place on some newspaper sheets, take 30 seconds to shake a rattle can and then mist away with 50% or more getting carried off into the wind. I know I’ve had my fair share of projects like this with sketchy results for sure, But with some careful planning and proper prep work it doesn't have to turn out looking like ‘crapolla’. The fact is, if you are careful, you can achieve pretty decent results without spending a lot of money or without expensive spray guns, compressors, paint booths, etc.

The intention was to do a quickie spray bomb on a helmet but my expectations of myself are a little too high for the end results to look poor. I started with a brand new Daytona 3/4 Cruiser helmet I got off eBay for about 50% of retail price. It was gloss white to begin with so I probably should have just wore it as is, but I wanted to do a little color split and got carried away...


STARTING THE PAINT

The first step was to strip the helmet down to the bare bones. I took off the edging so the paint could run edge to edge and the new trim wouldn’t have any gaps. I razored off the old edge and took out all the guts and put them in a bag in my office. I taped off the snaps originally because I thought I could just paint around them, but later ran into an issue.
After all the padding and edge was off, I scuffed the whole helmet with a scotch-brite pad. I know most painters prefer to use the red ones for painting but since the dollar store had three packs of the green ones, and this project was supposed to be cheap and quick, I bought those for a buck. In my mind the whole thing is going to be covered up anyway so why should it matter what color the scotch-brite pad is?


I had decent success with Duplicolor paint in the past when I did a touch up job on my old 1974 Cadillac. It seems to cover well and is sandable, so I thought I’d use that for a top coat for the helmet. For the color of the paint I started with one I’ve been a fan of for some time, Wimbleton White, which is a pearl-ish Ford color you see on many Focus and Fusions. In this case its more of an off-white color because I feel it would look better than a straight white overall. I picked up an 8 once can of touch up paint to use as a top coat. Since it only covers approximately 10 square feet (in perfect conditions) I thought if I sprayed some base cream color on the helmet to build up some color, I’d be in good shape and save a few bucks since I already had a couple of nearly empty cans from a older project still sitting in the barn.


After the scuff I used alcohol I bought at the dollar store as well on some paper towel to wipe down the shell and set it in the sun to evaporate. After about 20 minutes of gassing out I started laying the light coats of paint. The paint laid out well and seem to go on very nicely. Keep in mind I’m spraying everything outside, using a step ladder  as my base to hold the helmet. Having your object up higher so you can work around it, keeping the paint consistent is important and also lets you move around the object easier than if it’s sitting on the ground.  Ideally, for the best results its better to start somewhere inside in a well ventilated area, like a garage with the door cracked a bit; out of the elements like dust, bugs, etc. and you’re also going to probably get more product on the target than if the wind is carrying it away. After you build up your coats (three at a time seems to work best) and it has a good 10 minutes to flash up, I’d recommend setting it in the sun to bake and gas out. 

After all the base coat color went on I wet sanded with 600 grit and everything was looking great! There was a bit of checking in the paint around the snaps which I thought that either the tape absorbed some of the alcohol or I’d left some fingerprints even though I was really careful with the rubber gloves when handling it. I left enough texture to it to still have paint adhesion for the next layers of paint. I’d already purchased the next color for the scallops which is a Honda touch up color called Nighthawk Black Pearl, which looks mostly black except in direct sunlight which it appears to be a Blue-Black (think Superman‘s hair color) and has a bit of a mircoflake to it to make it shine. I saw it on a brand new Honda Civic and it looked so nice I wanted to incorporate it in a project somehow. As I started to prepare for how I was going to do my split with a grease marker and some painters tape, I sketched out a few concepts using the green 3M tape as a guide. When I came up to the points where the marker was going to hit the tape, I just rolled it back and continued my lines... that is until the base coat came up with the painters tape!

UGh! At this point I was pretty upset and couldn’t exactly pin point where things went wrong. I figured it was dirty hands prints or non evaporated alcohol still resting on the shell.  As I’d mentioned that there was a little checking (wrinkled paint) around the snaps so after I’d stripped off all the paint back to the base, I also drilled out the snaps on the helmet so there wasn’t going to be any reason for the paint not sticking. I also kept looking at the cans I’d bought and the age of how long they’d be sitting on the shelf. Everything lead back to that base coat of old cream colored paint that used as a base. It was a Rustoleum that didn't want to “play well with others”. I’d had a half empty rattle can sitting around from when I’d painted a mini bike several years back. So after putting in a few hours of careful work I found myself back to the base level again, scrapping off the old paint with lacquer thinner and a scuff pad.

I went to my local painters supply store and bought the red scotch-brite pads, high build primer, 3M painters fine line tape and some more sand paper. There’s nothing worse than starting over again but I’d be damned if I cut corners and wasted time and energy just to have it happen again. 

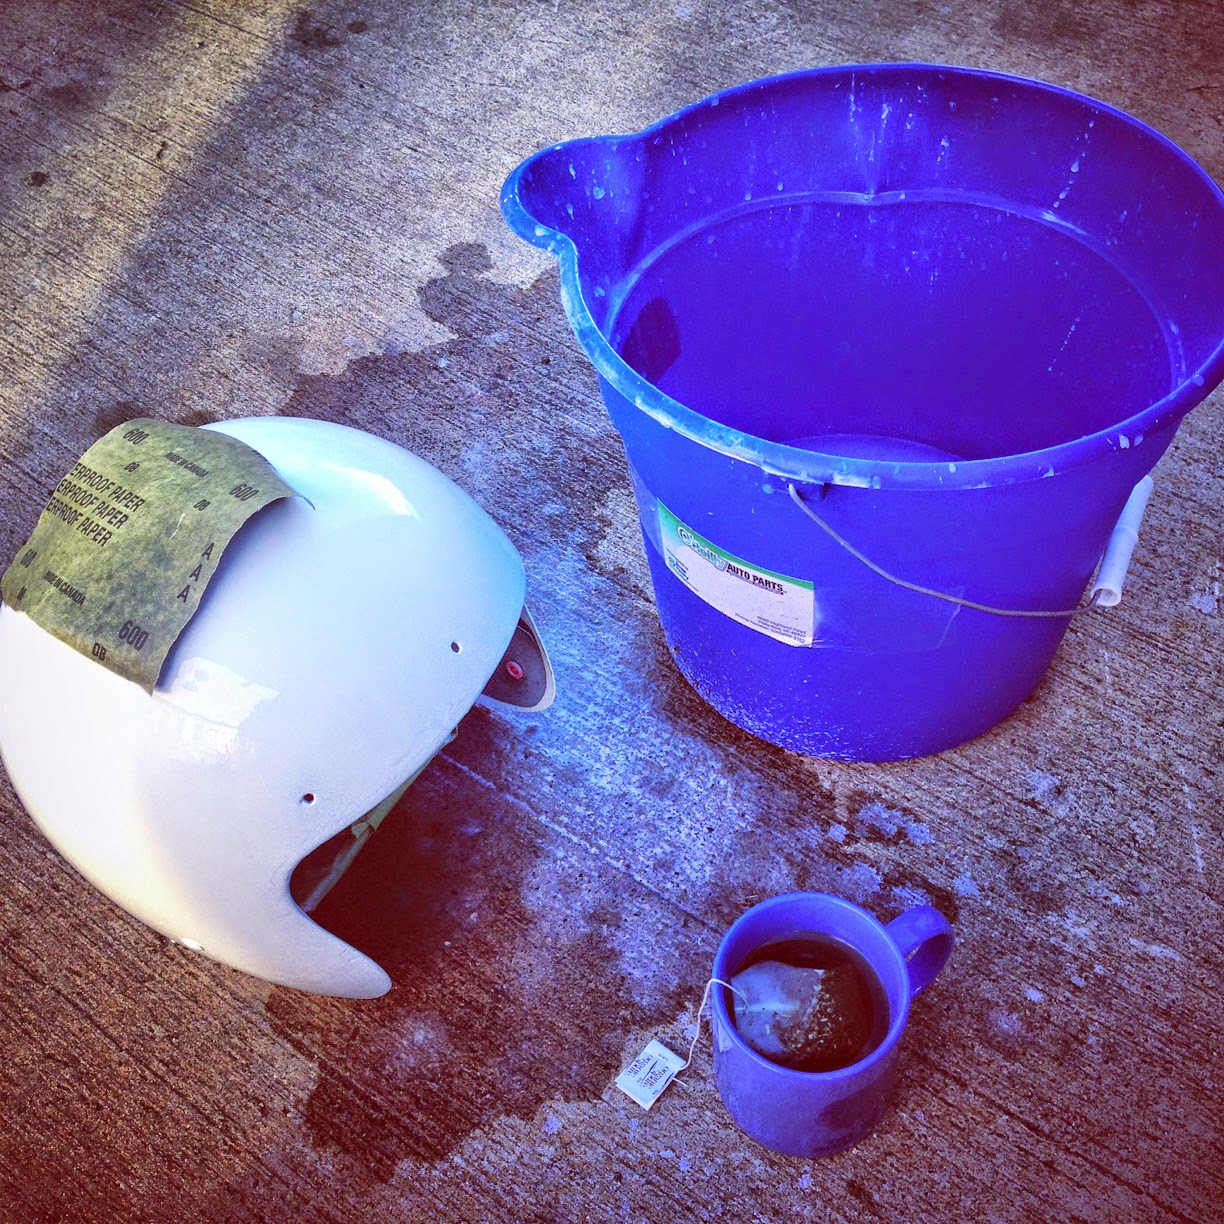
I made sure that the helmet was CLEAN! After the lacquer thinner I washed the helmet with soap and water then re-scuffed it again and wiped clean with alcohol. After it gassed out in the sun and I waited for a low humidity, low wind day, I sprayed again with the high-build primer. Several coats later first with dry spraying for a base to tack to, I laid down wetter coats (basically moving in closer to the target and overlapping the coats more). Another day went by to make sure the coats were dry, I wet sanded again with 600 grit using a soapy mixture with water. It sanded really well and then I re-scuffed again and wiped with alcohol, prepping for the color to go on.
At this point I started to second guess all of what I know about painting, thinking I was going to botch this again. It doesn’t take much to mess with my head when I got sketchy results just prior. From here on out though, everything went quite smoothly!

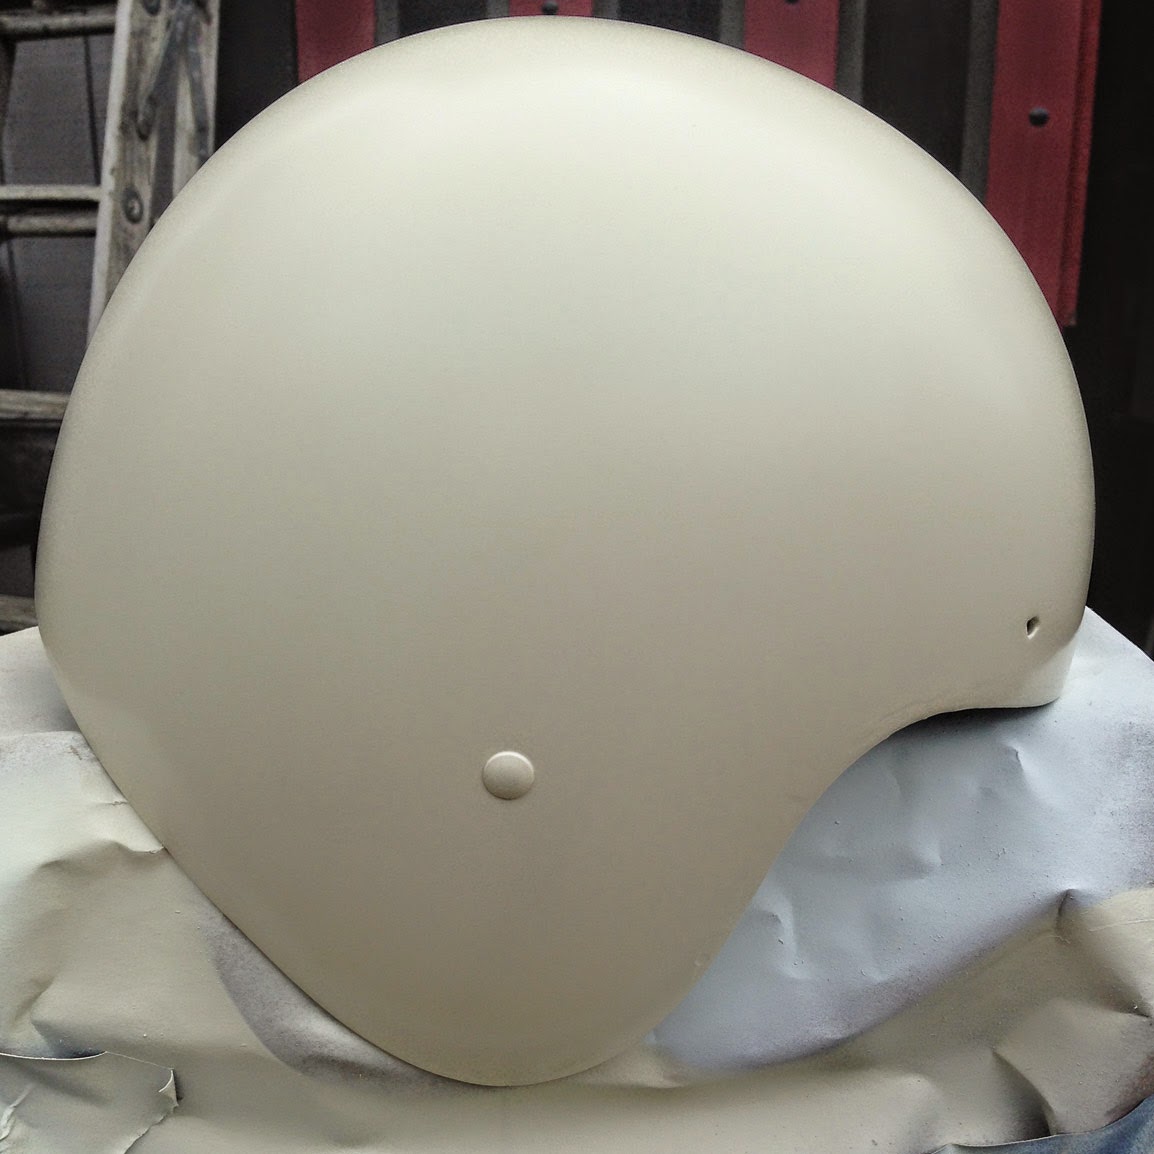
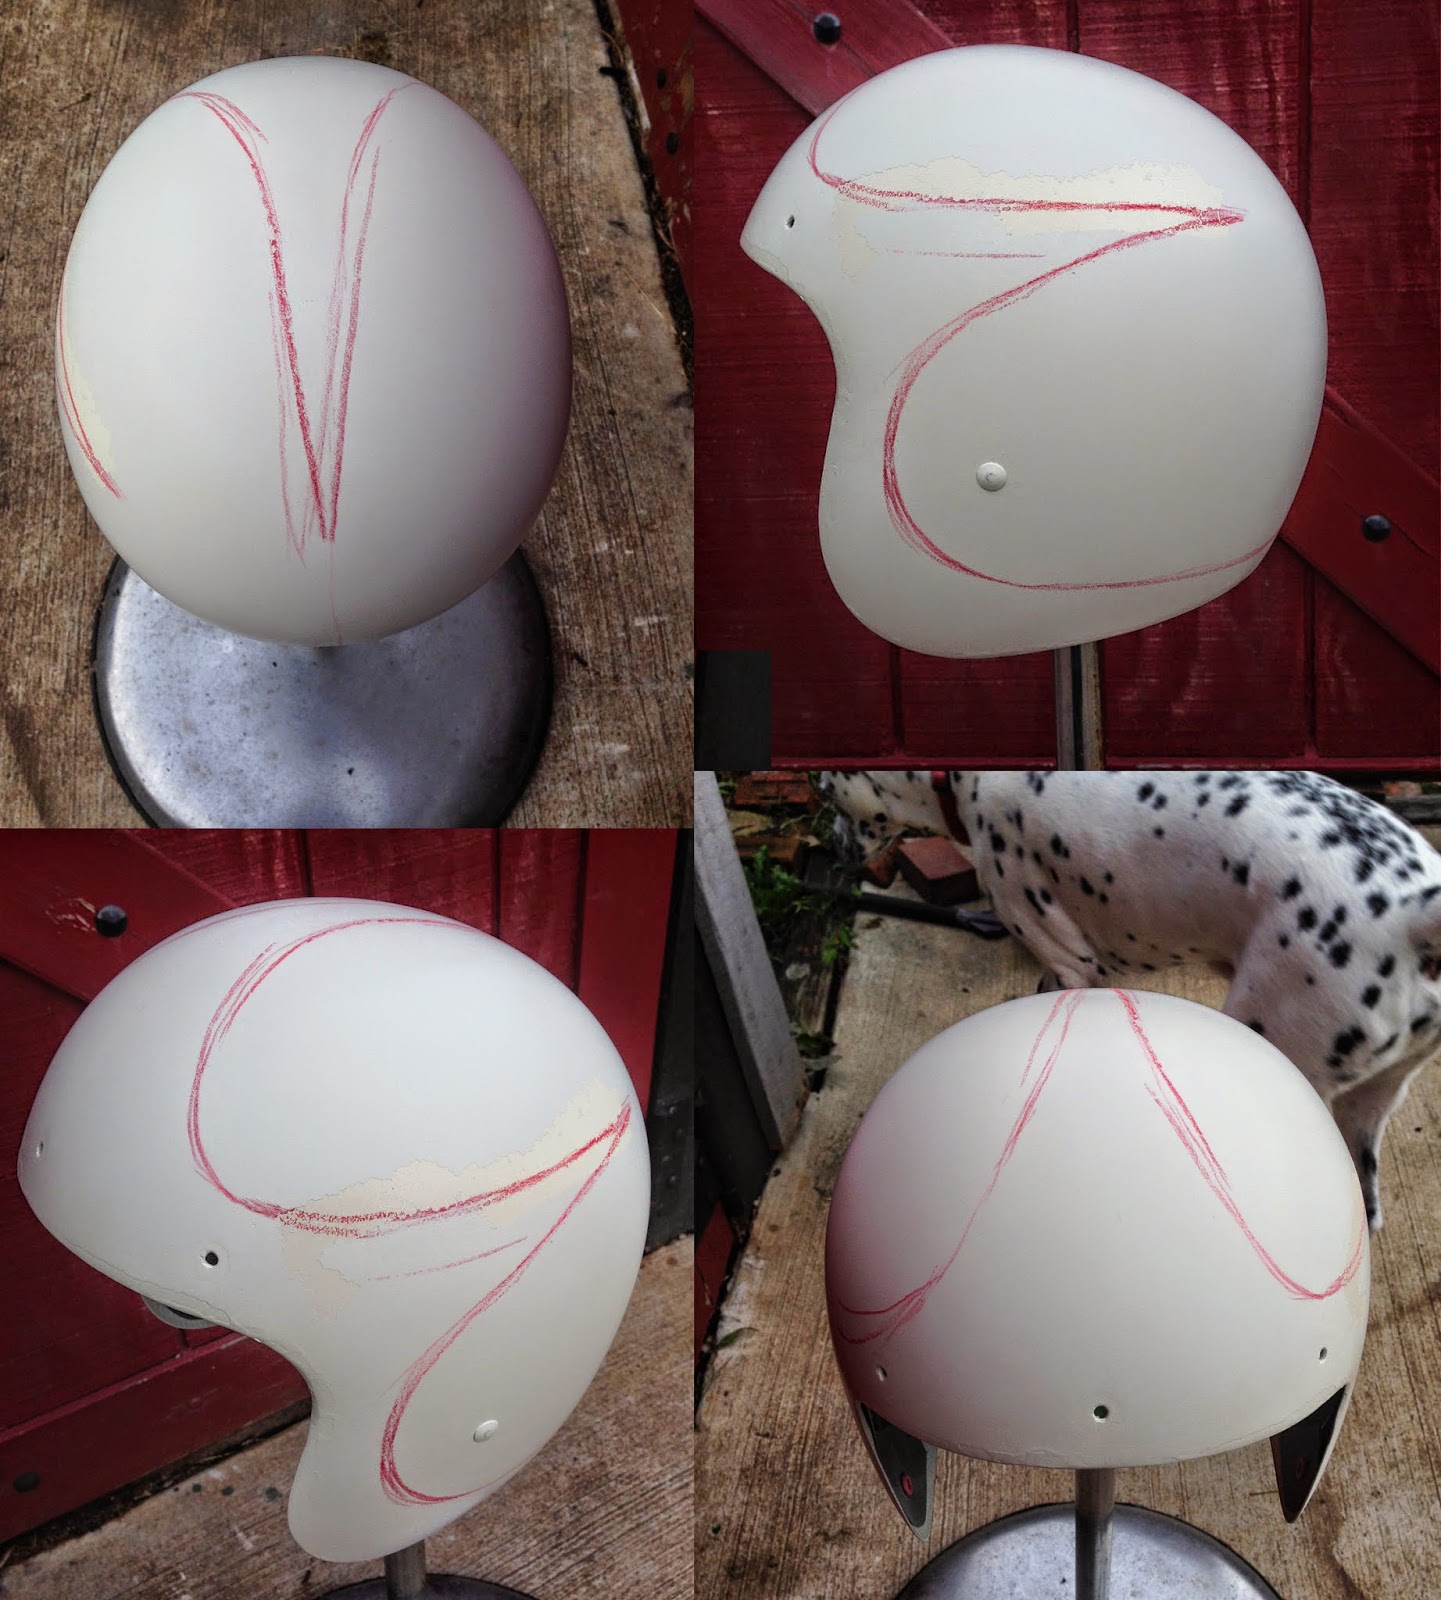
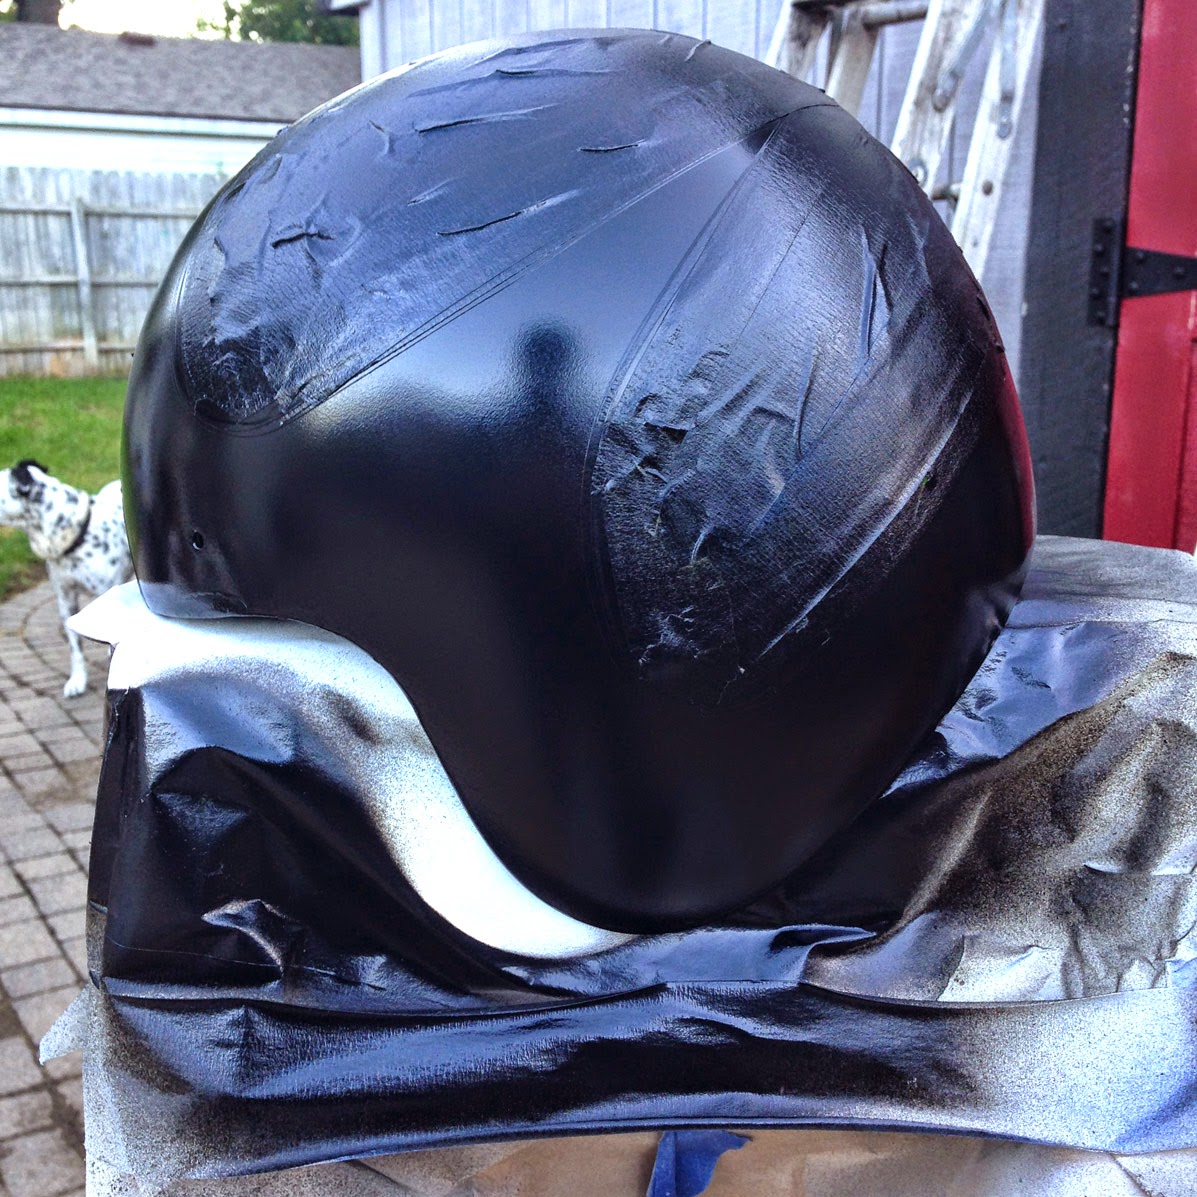
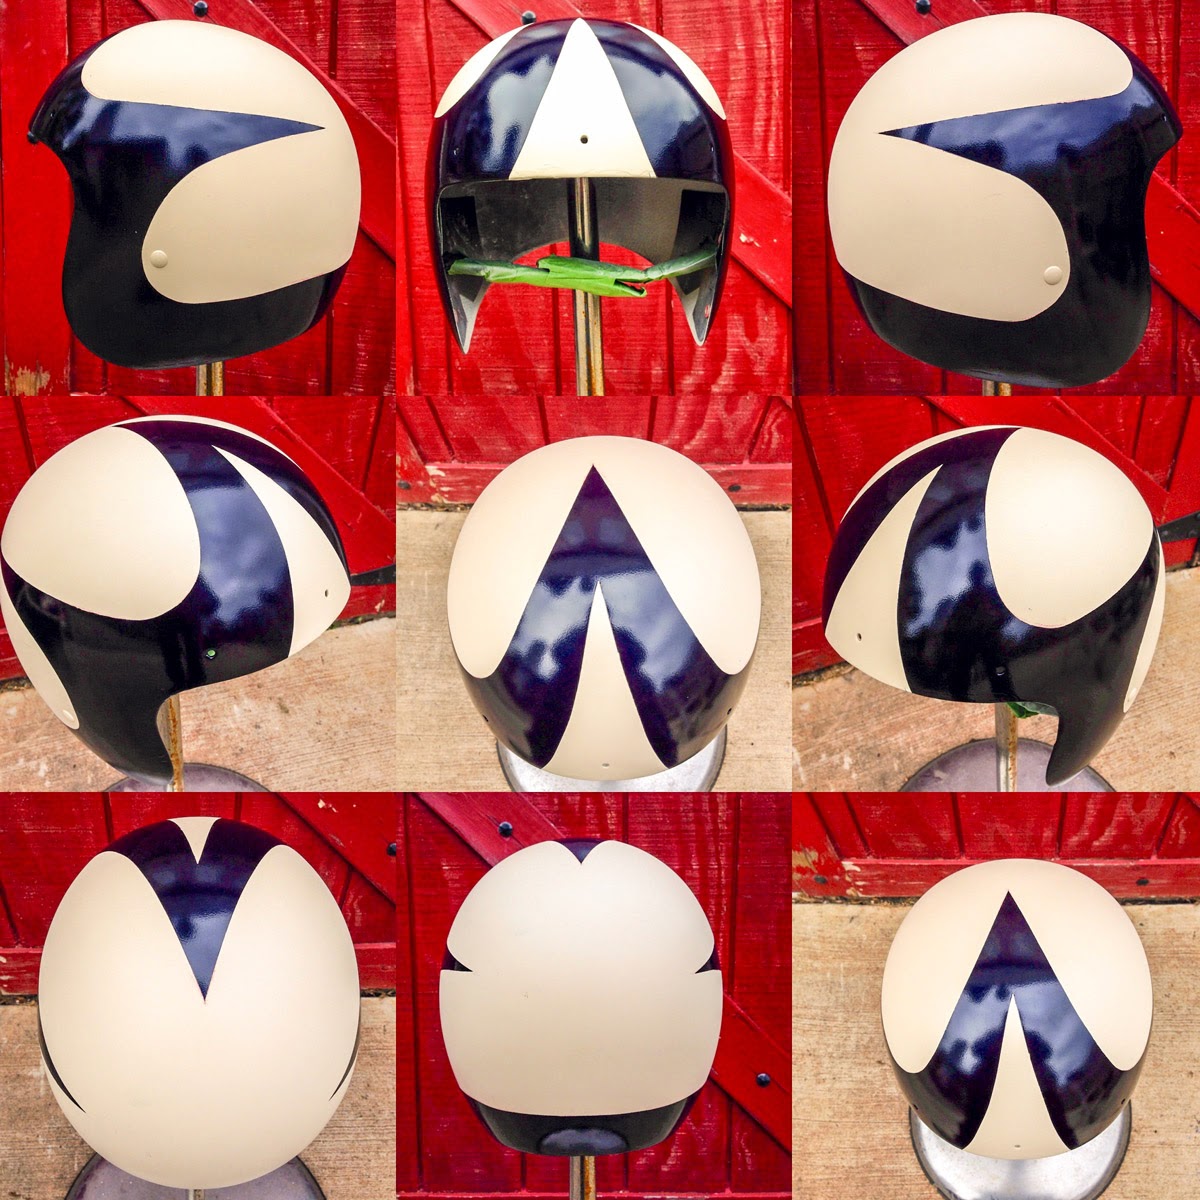
After the Wimbleton white went down (this time I doubled the amount of paint on the base so I could color sand) and it was sanded down and wiped clean, I started with the fine line tape free-handing the curves. The nice part was I’d already sketched out the idea perviously and had the pictures around for reference. I didn’t use any form of measuring tape, I just went by gut and some landmarks on the helmet (snap holes, rivets for the chin strap) and started to layout the tape. Over the years of my silkscreening experience I became pretty skilled at using just my eyes, fingers and gut to line things up. After I’d taped everything off for the new Black pearl I went ahead and did three quick coats on it. The paint looked a lot darker than I recalled and not as blue as I remembered it looked on the car, so despite my previous experience of using old paint, I went back in the barn and grabbed this can of Krylon Stained Glass paint. These stained glass paints only come in the primary colors and are designed to go on glass as a cheap way to achieve the stain glass work. The cool thing about this paint is not only does it spray really nicely, it acts like a candy paint since it’s very translucent but leaves the color tint only without a solid.
This time around I’d started a test panel always squirting the panel first, then the helmet to make sure all the paints react well with each other. So I wasn't going to coat with this old paint without testing it first. Since most of the checking happens pretty quickly, I would know if it was going to work or not. It coated very nicely and looked great on the panel so I gave it a quick couple coats on top of the Black pearl.
After letting the paint dry for two days, just to be sure, I carefully razored all my tape lines so that when I pulled the tape, I wouldn’t also pull the paint! I’m not 100% positive that it needs to be done with all paint, but I’ve had some unhappy results when I didn’t do this in the past, so I always razor it with color splits
After all the paper and tape were off I was very happy with the symmetry of the scallops.  The next thing that needed to happen is to start laying down the base level clear coat to build up the difference in layers of paint as there was a clear step with the three extra layers of paint between the white and black. After layering up two, 8 once cans worth of clear I started wet sanding again, this time with 1200 grit. I should have started with different levels of sand paper (600, 1000, 1200, 1500, 2000), building up, but I was using only with what I had on hand. 
It now came time to add a little pinstripe around the color split. Though the colors split nicely, there’s always a little spill over or inconstancies of the tape lines. In my case, I had nice lines, but a little bit of color spill from the blue-black to the white, so a nice little line would cover it up. I had the idea after I removed the snaps that I would be replacing them with brass snaps to give it a custom look rather than just putting the originals back on. So for the accent stripe I thought a metallic gold (which looks more like brass than gold) would work well.

Despite what I’m sometimes called on to do in the art world, I’m not a pinstriper. I know some very talented guys with steady hands but it’s not a skill I’m comfortable with. I did do a couple of attempts with the 1 Shot Metallic gold but I wasn’t happy with how thick I was doing my lines. So instead of coming this far and screwing it up, I consulted my buddy Lil Mark who’s a talented fabricator and pinstriper and had him lay down the lines. Many strippers don’t like the metallics because they are always thin compared with the solids. So Mark’s trick was adding a few drops of black to the mix to give it an antique brass color and also thicken it up a bit. 

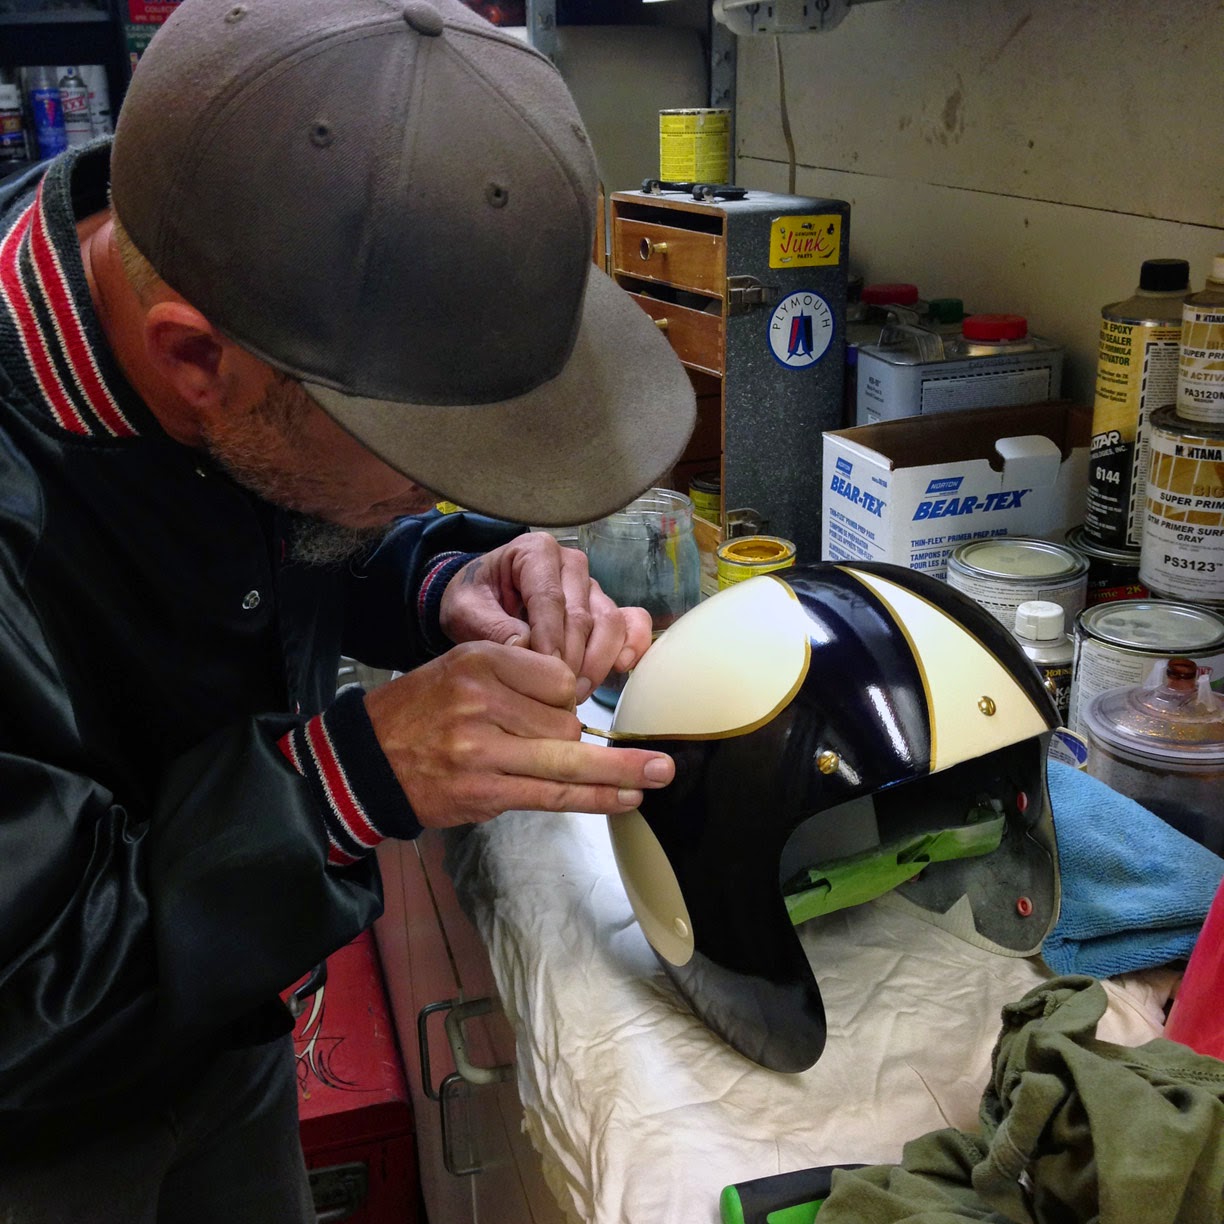
After the lines went down I wanted to clear coat it asap before something could go wrong. Now, since I had been doing my test panel first then the helmet, I didn’t have that same paint on anything other than the helmet. There was a bit of a happy accident with the gold as it got an interesting texture to it under the clear. It’s very fine, so unless you are looking for it, it’s not really noticeable, but I like how it brings a human side to this. It almost gives a gold leaf look to the project.
I ran two more thick coats of clear on top of the helmet. After the second coat of clear I saw a bit of fogging happening which is a pretty good idea to stop as it means there’s too much clear and it’s going to start doing weird things from there if you don’t stop laying it down and you end up with a mess. I also had to change brands of clear from the Duplicolor to Rustoleum but in all my tests it worked fine.
The last step 36 hours after the clear coat went on was the last wet sanding with 2000 grit and soapy water. I did a light cut with that, knocking back the majority of the orange peel texture to it and then moved on to rubbing compounds. I watched a few youtube videos of people doing a cut and rub and learned a little more than what I already knew. I hadn’t considered the difference in the nap of the towel or the pad making a big difference. So with the heavy cut, I started with a terrycloth pad and rubbed and wiped down, then did the same heavy cut with a finer towel. I did the same two steps with the fine cut compound, one with the terrycloth pad and again with the finer towel. The last step was with a scratch remover compound that you can buy at many auto stores designed to take out light scratches and swirls in the clear coat on a car. This went on and came off with a microfiber towel.

THE FINISHING TOUCHES:

To make this helmet more custom I’d mentioned that I wanted to use brass snaps instead of the typical Nickel plated silver snaps. Now, the issue was finding some solid brass snaps. Most seem to not be made of actual brass but rather a coated version of them. I know that military snaps are often solid brass but doing some research on them I realized that I would need to order packages of 100 snaps in most cases to get just a handful needed. 

I ended up buying a 10 pack of ‘antique brass’ snaps off of eBay for a few bucks. These aren’t full brass but look correct over a solid gold appearance of the other ones listed as brass. I wanted to match the pinstripe look with that hint of black in it and the antique brass ones looked about perfect.  I had this idea of how to attach them using ‘Chicago Screws’ sometimes they’re called post screws or binding or blind screws. Basically two fit pieces that cup together with a space between for a solid object. The cap of the screws only came in one size so I knew that the cap needed to be milled down about 1/8” all around to slide inside the cup of the snap post. 

My buddy Eric is a talented artist and clock maker who gave me a hand in turning these screw heads down to the proper size. It worked out perfect! I got a great fit and a great custom look! It’s always handy to have a friend with a truck and even better to have a friend with a lathe! On the front snaps I had to take about 1/16” off the post side to make sure there wasn’t any slop in the snaps which I did with a quick grind on my bench. After getting them in, it was time to do the new edge trim.


I’d recently picked up an office chair at a thrift store for $2 and rebuilt it combining three old chair parts together. I’d asked a friend about how he was redoing his helmet trim and got turned on to RV suppliers who sell edge trim. It’s really easy to use and a great way to customize after you paint. It comes in a few standard colors: Black, Brown, Gray, White and Off-White. Custom colors can be ordered but you have to buy spools of 100’ or more for custom. Having some extra on hand from another project I liked the look and contrast of the off-white color, I decided to use it on this helmet, again, giving it that custom touch over the standard black. It takes approximately 3.5-4 feet to do a standard 3/4 helmet.

Edge-Lok just pushes on; there’s no need for glue or the like because of the nature of how this is constructed. It grabs and holds once in place and is very durable. I did discover if you want to re-dye it, the Duplicolor interior spray dye does an awesome job and available in some loud colors too. Very durable product from what I can tell from a test. 

The last step in this actually happened right before the wet sanding of the clear. I had the idea to add a goggle strap to the back. Since most helmets no longer have these straps, and I actually wear goggles on longer rides, I needed to drill a hole. I added two layers of painters tape to the outside of the helmet before marking and drilling as I had a fear that I’d crack, chip or gouge out the clear coat. I don’t know if this is 100% necessary but I like to do this to be safe. Using a Dremel tool on a low setting I made a small hole and then used a rattail file to bring it up to 1/4” needed for the Chicago Screw/Snap combo.

The last step was the strap itself. Most helmets use vinyl for the straps which looks cheap to me. I wanted to use leather, but white leather is harder to come by. There is a bleaching process that can be done to leather to make it nearly white which would work well but all I needed was a 6” long by 3/4” wide piece, too much work for such a small piece. I got the idea while out thrift store shopping. I often look at men’s belts because you sometimes find nice, top grain, full leather belts for a couple bucks. I never made the connection until I was planning this project and new I wanted a white leather belt. So I hit the women’s section and found a few, but only one all leather white belt for $2. 

Having done some leather work in the past the first thing I new I wanted to do to this belt was soak it in water because leather shrinks when wet, especially this bleached out leather. This is probably one reason most helmets have vinyl goggle straps to prevent them from shrinking. Since there is a good chance that the helmet will get wet in the elements, I thought it would be a good idea to preshrink the leather so it didn’t happen later on and never be able to be snapped again because it shrunk. To do this, simply get a bowl that will hold the belt coiled up and boil some water. Place the belt in the bowl and pour the water over the belt until it submerged. I recommend keeping the bowl in the sink incase you have spill over. In my case the belt shrunk in length and width so it only needed a little trimming and two holes punched and the snap cap put together to complete the strap. 

The final step was reassemble the helmet padding, which was a lot harder than getting it out. I don’t have much advice other than you need to put some muscle to it to get it back where it belongs for the skull cap. The rest was pretty easy as they cheeks just snap in. Overall, I’m really happy with how it turned out and how nicely it all came together.


20 TIPS FOR SPRAY PAINTING FROM A CAN:

I’m by no means an expert but I’ve spray painted a lot of junk over the years. Most of what I’ll list here are common paint tips, but apply to this project as well.

  1. Wash your hands! Keeping your oils off the project is key to adhesion of paint. Wear powder-free rubber gloves when handling your project. Keep your project clean. Not just oil free, but dust free as well.
  2. Back tape the edges of your work with painters tape. This will allow an easier transition of the paint and what you are painting on not to stick together and ruin your project. It will also allow you a place to place your fingers if you need to pick up or move your project.
  3. Elevate your project. If it’s possible to get your project to an area you can walk around and comfortably shoot at from an upright position, you will have much greater results. I recommend saw horses or a step ladder in an open area. Keep in mind that most spray paint cans are designed to work in a vertical position only.
  4. Keep a consistent distance from your subject. Always try to stay the same distance away when you make your results from tip to topic. If some areas are hard to reach, do some practice motions without spraying so you know if you need something to step on or whatever to stay consistent.
  5. Don’t use old paint! It cost me a lot more in time than money to just buy a fresh can. Take your time and test everything before you get in a hurry to lay it all down.
  6. Wipe your project down with alcohol before you paint, let it gas out before you spray (about 10-20 minutes to evaporate). This is basically true for every color change, scuff or between long periods of 24 hours or more with coats.
  7. Follow the instructions on the can. They are usually right but give very general specs based on a wide range of conditions. If it’s hot, you probably need less dry time and cold, you’ll need more.
  8. Shake the dang cans up! Don’t forget to give a good shake. If you’ve been spraying for 30 seconds or more consistently, you probably need to give it a quick shake before starting again. When the can gets low, it can “spit” at your project. Stop using that can if it’s spitting as this causes more problems than it helps.
  9. Do a test panel!  I highly recommend having a piece of scrap sheet metal or plexiglass that you can test all of results on before screwing up your project. This will allow you to see what the paint will do before you paint your topic. Do all the same steps as you would with your project with prep and treatment. If you do all the steps, side by side, first on the panel, then on your project, you may be able to see where things went wrong before messing up your project. Use this test panel if you’re the kind of person who likes to test to see if the paint is tacky with your finger.
  10. Do light coats at first and let them just set up a bit before the next coat. After a tack coating is done, use wet coats (move in a little closer to the topic) Example: If your light, tack coats are are 10-12" away, your wet coats will be 6-8" away from your project.
  11. Keep a “wet edge” . Overlap your coats moving either left to right or up and down. Don’t let it drip or sag if you can avoid it. It can be fixable, but you'll spend a lot more time and energy sanding than if you were careful to begin with.
  12. Between coats of paint, invert the spray can and discharge until it’s just air coming out. This keeps the nozzle clean and ready for the next use. This is pretty important step. Some spray paint cans will print this info on it, but many do not. It makes a world of difference to blow out what is in the tip.
  13. Make sure your paint and your thing you are painting are the same temperature for color paints (see tip #15 for clear). I’ve had some weird results if either your paint or your project are different temperatures. Paint when the temperatures match whats on the can suggested temps and when the humidity and wind is low. If your project is airing out in the sun, move your rattle cans to the sun. If you take your project back to the shade to paint, do the same with the spray paint as well.
  14. Paint in the shade if you can, not in direct sunlight. After the paint begins to set up (10-15 minutes), you may move it to a sunny spot to dry faster. Remember to rotate the piece so it gets sun all over .
  15. Clear coat goes on better when the can is warm. To make the can warm, either place it in the sun directly and rotate it or place the can in a warm bucket of water. It goes on much smoother than if it’s cold.
  16. If your neighbors are mowing the lawn or something that can kick up dust and debris, don’t paint! Or if they start to mow the lawn after you just laid down a layer, move it inside somewhere so it doesn’t pick up crap in the paint. If you should get debris in your paint (like a bug, dog hair, etc) I recommend waiting to remove it when the paint is dry vs. wet as it can be easier to tackle with sanding when dry. I've had some success with tweezering out a rouge dog hair when it's jutting out of fresh paint, but if it's laying down and you start messing around with it, you cause more harm than good.
  17. Scuff between color changes with a red scotch-brite pad and clean after first with soap and water, then with alcohol before the next coat. If you color sand both colors of paint there is a risk of some bleed over between the colors. The solution is to build up clear coats and sand those so there is less of a step between the layers.
  18. If you can paint inside or a garage or larger space, make sure it’s well ventilated. Mask off areas you don’t want painted as spray paint can really travel.
  19. Lay down enough layers (minimum of three good coats) before sanding, otherwise you will sand right through it.
  20. When doing a color split, I recommend lightly razoring your edge between the paint and the tape so when you pull the tape it doesn’t pull or crack the paint. No need to push hard, a simple scoring of it should suffice.
SANDING/BUFFING TIPS
  1. When wet sanding, use warm water with a mild soap. A good choice for soap would an automotive wash, not a scented hand soap/sanitizer/etc.
  2. No need to “push” when sanding, keep it light and let it glide over your paint. Keep the paper and your project clean. If the paper gets debris in it, throw it out. Keep the water clean. Sand in an X pattern for best results. Keep in mind how much clear coat you put on before grinding it down. If you go through, you’ll be starting again.
  3. Buffing with compound using a variety naps in towels can give different results. Work from large naps to fine naps, ending in micro-fiber towels. Make sure the compound you buy can be used by hand as some are formulated for machine only.

ONE LAST TIP:
Painting can be expensive, but some things can be bought cheap. Hit the dollar store for disposable items like drop cloths, masking paper, alcohol, terrycloth hand-towels, rubber gloves and the like. You can save a lot of money on things you toss away if you buy smart.
I hope some of this helps someone out! 

UPDATE: I just did a little reading on the subject of aerosol clear coats and came across Eastwood's 2K Clear, which is a two part paint all in one can. I haven't tried it but it sounds like even with a price tag that's more than double of a typical can of higher end clear coat, it could outlast the competition. I saw a video where they wiped it with acetone and it didn't come up, so I'm already sold. Want to send me a can I can test out, Eastwood?!

Tuesday, December 17, 2013

Who’s says ’13 is unlucky?


Editors note up front: I'm exhausted just rereading this. I only wrote 4 blogs this year and perhaps this mother load will explain why that is!

From day to day (week to week or month to month for that matter) I often don’t know what I’ll be working on. Nearing the end of 2012 I got a very rare opportunity to meeting with some executives in Milwaukee and was passed a Hail Mary  on a big job (for me at least) to work on. I had detailed a bit about that job back in January when the release of the collaboration of Harley-Davidson and Kid Rock. What I’d learned is I’d inadvertently knocked one out of the park for the two parties. This home-run opened many doors and set the tone for me in 2013.


In January I was invited to the table as an illustrator to work on some rebranding for the Harley Owners Group, aka HOG. This was a long endeavor of work that was split up amongst a bunch of artists with different interpretations of what HOG is. We were broken into groups based on style differences and then set loose with themes to play off of. I kind of like this version of working because there’s enough freedom to explore within some boundaries that we can set for ourselves. Along side of the work done for HOG I also got to stay true to doing event poster work as I’d done in the past, working on Half Fast’s Burning Love event poster for their 6th annual Anti Valentines day event.


Coming up quick into February I was re-invited to work on a t-shirt for the Garterbelts and Gasoline in Australia.  This time I was set to outdo myself on the concept of a gal, a Olds Rocket powered auto and as always to sneak a physical rocket into the design somewhere. Just after this shirt came a second one for Vinsetta Garage for the Miss Autorama Pinup Calendar Contest. What I like about this design is we wanted to give a sense of the pinup, but without an identity to the person who may win. Mid February  I was invited to send a CarbElectricCo lamp over to New England for the Art of Speed III where it sold on opening day. One of these days I’ll just have to make a lamp for myself to keep. Wrapping up the end of February, H-D came knocking again for some design work for the 2014 line of clothing. So, I really won’t know what, if anything will end up on the shelf at dealerships.


Early March I was set up in the tight little booth in the basement of Cobo hall for Detroit Autorama. I have a bit of a love/hate relationship with the show: I love it because it’s like a mid-winter reunion with folks and friends I don’t often get to see. I hate it because it’s several days of work and I really don’t get the time to visit with those folks because I’m stuck in a 6x6 foot booth attempting to make a sale on some of my art and wares. You take a the hard concrete floor with the warm smiles of friends.


With March came the continuation of the Vintage Torque Fest posters for 2013. John Wells who runs the show as a benefit for Helping Hannahs Heart has been a bud for some time and the design freedom I get from him allows for a lot of creative expression and making the show have a little different feel each year. As before we have always done multiple posters: One for Hotrods, Kustoms and Motorcycles. Along side of this there’s the coveted “Drivers Patch” for those who will take their cars, trucks and bike out in the dirt for a spin on a closed course.

In April I found myself taking some time out (as I’m sure I will in 2014) to get all of my tax info straight. There’s nothing like waiting until the bitter end to find out how screwed you are due to owing taxes! It was also in April Harley-Davidson came a knock, knock, knocking again with another HUGE opportunity that I was truly honored to take a stab at: The 110th Anniversary Harley-Davidson Motor Company Poster. It started with three simple concepts. Two of my choosing and one that came down the ladder which was ultimately picked. By request the good folks of Advertising and Promotions wanted to see what it would look like if the 110th was crossed with Woodstock. Though the design was simple in many ways when you break it down, it also created many issues with space and dominance issues. The poster featured 3 big acts: Kid Rock, Aerosmith and Toby Keith as well as a stream of twelve additional acts and 6 sponsors. Needless to say with as many personalities and corporations involved the process of laying things out and getting them approved became a long, arduous task. The minute you move one thing, everything else needs to move with it. Many variations of the art came out, though to most of you probably didn’t notice the differences with color, scale, aspect ratio, etc. This project carried me throughout the month.


In early May came the annual trek to Vintage Torque Fest, this year in Dubuque Iowa.
Spring didn’t come as early as hoped with the dates for the kick off show of the midwest as there was some sleet and snow happing the first day of the event but never the less the hotrods and customs made it out and a good time was had by all those attending the show. Quickly after my return home I jumped into the advertising work on John’s other show: Iron Invasion in the fall. Beyond some smaller gigs and retuning of art for the 110th anniversary poster, H-D came knocking again. This time for a give away voucher for Born-Free 5.


The next thing I know I’m already half way through the year and it’s June already! Hands down, my busiest month of the year! The first weekend of June traditionally kicks off with the Sins of Steel show for Hotrods, Customs and Motorcycles. I had to slam out some work show merch right before the show began but in the end, everything came together. I’d skipped on setting up at the show in favor of helping out. 

The following weekend had been invited to take part in yet another huge honor: Orion Music Festival: Motorbreath Alley Art show. As if you couldn’t tell up until this point in the year, I was ‘slightly’ busy with a ton of bigger corporate work and not much time for myself to generate anything personal, but I did take a little time in May to get back to building a few lamps in the barn where two of them were on display at this awesome Detroit music festival with Metallica


The following week, after much discussion with my counterparts in Milwaukee where I was invited to take part in a cross country “Ride Home”, I found myself enrolled in the Rider’s Edge - riding academy program. Though the thought of a cross country trip was something I’d always wanted to do from an very early bucket list, I first had to conquer getting that pesky license to ride. Mid June I took the 4 day course and honestly, it was life changing and well worth the time. On Sunday, June 16th (Father‘s day) I had completed my testing successfully and the following day I took the test at the Secretary of State to have my official license.

By the last weekend in June, I found myself California bound for Born-Free 5 to set up along side of my buddy John Wells in the Vintage Torque booth. I have to hand it to both Mike and Grant on the show they’ve built; it’s really a mecca of American styled vintage choppers and bobbers. The definite highlight of the trip was when a couple of good folks sought me out at the show: Karen and Willie G Davidson! I was blown away and humbled that they came over to thank me for all the hard work I’d be doing for their company. It was a crazy fast trip where I got a chance to see some of my buddies from Cali that I worked on Deadheads with and also got the chance to attend and vend at this incredible show!

All the while working on the Model Year 2014 branding for Harley-Davidson’s “Project Rushmore” - The largest scale new model launch in H-D's history and simultaneously taking any waking hours from my schedule to keep all the prep and behind the scenes work for Midnight Mass Detroit. June was freaking nuts and I don’t even know how I managed to keep all the balls in the air that I did.

The first week of July I carried on with the MY ’14 work with Harley-Davidson. This was a real time crunch with everything weighing on Midnight Mass Detroit. I remember feeling like a tick about to burst at the seems - being spread to unimaginable odds again like I was in college. The pressure of Project Rushmore in conjunction of launching our own show was getting the best of me. The good news was the H-D work went dormant for the moment long enough to get Midnight Mass Detroit in the record books! Though we’d sold every spot in the parking lot, we still had a lot of unaccounted spots at the show. Never the less, the show went off as well as expected and we were able to donate money to our charity of choice in the end Helping Hannahs Heart. 

Immediately after the show I was back to work again for H-D with a new endeavor for the Veterans of the US military. This project went several rounds as well with different interpretations of the look of the Eagle as well as the banner that was going up in local dealerships across the US for the Military Remembrance Month of November. 

Every other minute spent outside of working, being a father and husband in the family was spend on two wheels. This was all in preparation to putting some miles on my new 2013 Softail Slim to both break in myself as well as the motor. I owe a lot to my good friend Roger for helping me out, being my co-pilot and taking the time to show me the ropes beyond the classroom.

By August, I was really wrapping up aspects of the trip involved in traveling from Washington to Milkwaukee for the 110th anniversary. I had a ton of prep work from contracts on the space to vend from at the show, the insurance to be set up there, poster creation for a limited run of the “celebration poster” as well as the live aspect to the show with a limited edition live silkscreen on site. All the midst of this and also attempting to keep some work flowing in I was working on some side identity projects for folks, wiring some lamps for the show, arranging transportation of the motorcycles to head west, one way airfare for myself and Roger and continuing to put miles on the bike. 


Soon enough I got the call that the trailer coming for the bikes was here. I’d just finished putting lock-tight on the sissy bar I built for the trip and it was time to go. When the Softail was picked up it had 451 miles on it that I put on, not quite half of what I needed for the break in fluids to come out. That night, I was able to obtain tickets to see one of the eight Kid Rock performances at DTE energy theatre and more importantly to me, see my identity work larger than life both on huge canvas wraps as well as on a jumbo screen animated! Kid Rock is an excellent performer and I was really impressed with his scratch session he did in the middle of his set. 

The next couple of days were spent finishing up my display items for the show and pre-packing the truck before I was yet again headed off to DTW for the one way trip to Spokane, Washington. I left with as much as I could get done but two things that weighed heavy on my mind was my dog Rocket was very ill with a stomach issue that was causing some messes around the house for Wendy to clean up behind in my absence. The second thing was I was yet again going to miss my son’s actual birthday again. It’s always hard to make some choices in life when you are trying to balance career and home life. Ultimately, I had made the choice to go (obviously if you have been reading along thus far).

I’m not going to go into an abundance of details on the cross country trip we nicknamed the three-13 ride. I’d already cataloged all my notes that I’d updated along the way in a previous blog and posts to Facebook and Instagram. Read all about that here: http://car-n-art.blogspot.com/2013/09/my-hd110-ride-home-experience-from.html What I will say and have repeated many times that it was ‘ambitious’ of me to attempt. I would say I wasn’t quite as prepared to attempt this as I felt I should be, but never the less, I’m certainly glad I did it! I’d recommend to anyone who has thought long and hard about it to take a day out and ride on highways only and drain, then refill your tank 3-5 times in one direction. The next day come on back home and see how you feel: If you’re ready the next day to do it again, then the next... For a lot of folks out there who bar hop, its one thing, but serious long days in the saddle are taxing. Think about what would be easier on yourself: Figure out all the equipment you’d need up front.

In all it was 1900 miles in 4 days of riding from Spokane to Milwaukee through mountains, rain, 100 degree days, wind, gravel, bugs, twisty road as well as 100’s of miles of just straight shots with nothing but you’re thoughts and smells of the road.  The goal was I had to meet up at an exact time and place with my wife at the Harley-Davidson Museum to set up for the 110th anniversary.

From beginning to end of the 110th Harley-Davidson anniversary was filled with awesome experiences. The crew who put the show on at the Museum was top notch to say the least; I’d never gone to a smoother running show, hands down. I was so busy with my wife and I running the booth I didn’t get much of a chance to get out and enjoy the bands, the demos, the parade or the Museum itself but the time was filled with amazing experiences and people! Some highlights from the show were meeting with folks I’d only communicated over email and phone with. Meeting more of the folks who make up Harley-Davidson MoCo. I was able to donate one of the silkscreened versions of the poster to the Museum itself for future generations to look at down the road as well, Willie G asked for one for his personal collection of art. Again, I was beyond humbled and overwhelmed with the experience. Another highlight was the invite to a private party after Kid Rocks performance where I got the chance to meet Bob Ritchie and thank him for all the help he brings back to Detroit. 

The show went from late August until early September. On Labor day it was time to hit the rode and saddle up for my real ‘ride home’. Slightly worried about traffic on a holiday in Chicago, we left before the sun came up. Wendy in the truck and me back on the slim. The trip from Milwaukee to Detroit isn’t actually that bad in comparison to what I had been doing in previous days of riding to the event! Grand total on the trip of 5 days of riding was 2,283 miles. Not bad for a new rider :)

There really wasn’t a day off either from this long trip, it was straight back to work for me. It seems as soon as I post that I’m away from my desk working, that’s when the work begins to pile up and the requests constantly coming in.  Besides the work requests, I was also able to broker a deal for my 1949 Ford Tudor Sedan to head to northern California with some help from friends! I had taken the car about as far as I wanted to go with it so it was time to let it go to greener pastures and soak up some California sunshine. So part of my September was getting that old girl out the door as well. 

Another highlight of September for me was issue 155 of Cruzin Magazine from Australia did a nice write up on me in the art section! I was super stoked to not have to ‘play the game’ in order to get the press. Understanding that a lot of what happens behind the scenes with these kinds of things with ‘greasing the wheels’ to get what you want out of it, it was certainly nice to have some press based on merit alone.

September finished up with a lot of reorganization after the trip, some more riding on the Slim and some bigger graphics jobs on a larger scale. Lastly, I was able to generate a personal piece called "The Wrecking Crew"


Right into October now it was time again for the second running of the Iron Invasion in the greater Chicagoland area. Because of set up times it was easier for myself to leave a day early and catch up with my friends of Brown Magic Paint Company. Mando came to the rescue for me on a Helmet show called “Skull Canvas” at Barber Vintage Festival by actually turning one design I had kicking around into a real deal. I was so fried from what had been going on in the past months to barely think about translating something onto the helmet. The evening I came down we hung out with his cousin and wife in the neighborhood of where the famous John Wayne Gacie went all psycho clown on a bunch of young men in the area. It was a little creepy to think about while over there but nothing that some good beers and Korean food wouldn’t fix. Friday it was on to the show. The weird thing about this year was how much great buzz came from year one that should have boosted attendance for this second year, but it just didn’t happen even with the extended marketing for this show with shout outs from sponsor Harley-Davidson on their vast social medias. I blame the government shutdown on some instability as everything really looked like the perfect storm for this show.


Later in October I got the chance to yet again work on another Top Secret project for Harley-Davidson. This time, like with Rushmore, everything was closely guarded. So close that even on a air-tight non disclosure agreement (this is the thing that when people ask me “What are you working on now?” I can’t offer up much information because it’s MY ass if something leaks and can be proven to chase back to my trail) I was wasn’t allowed a name, a photo, or anything about this new bike coming out with an entirely new platform. What I knew was it was a smaller CC bike, youth oriented, and a global project for the American born company. I was asked to provide some concepts and eventually had to put my foot down and know at least something outside of some vague descriptions of what the bike was. Eventually the code named “Project G” let down it’s guard a bit, long enough to design up a poster for the international reveal of this bike. 

Early November found me back at DTW for what I thought would be my last trip of the year. This time I was headed to Kanas City, home of the Dark Customs plant line for Harley-Davidson. I got the rare opportunity to be part of the US dealership reveal of the Street 500/750 bikes at the unveiling. We printed up 2000 posters for the event as a give-away to the US dealers and I was onsite at the reveal as a special guest artist to sign and personalize the posters. I was again very honored to take part in a landmark event for HDMC! It certainly not every day I get to take part in a forum like this! 700 posters were pre signed as the audience of nearly 2000 people wouldn’t all have the time to stand in line just for a signature! The signing took place during a ‘cocktail hour’ which in reality was two hours long but my line didn’t seem to cut down until the tables were being folded up and chairs stacked! I missed out on eating so it was time to hit up local buddy Tyler for what was good in his hood. Tyler met me for breakfast in “Lower Bottoms” - the railroad yard district which in my opinion was way cooler than the freshly multimillion re-landscaped downtown. Don’t get me wrong, Kanas City is beautiful, but it’s got this appearance flavor of Disney written on in... like it was solely done to attract tourists and in turn destroyed a little local flavors. The Lower Bottoms looks to me to be unchanged and therefore has the kind of character I appreciate when traveling. 

Once I returned I quickly got the notion that I clearly hadn’t spent enough time in airports or shoved into economy seating aboard an airplane (can you read my sarcasm?) This had already been an epic year for me to this point so it was time to go for broke with one show I’d been wanting to hit for years now: Yokohama Mooneyes.
As soon as I’d returned from Kanas City I called up John Wells again to pick his brain. Knowing it was way too late to even consider going to the show to vend (nor did I really want to as I wanted to see a show for a change) I asked him about the travel and some of his tips. After getting off the phone I started searching for flights to Japan.

I was able to find a flight with the cost of what I was comfortable with, so that pretty much seemed like it was meant to be. Next up it was booking accommodations for the stay in both Yokohama and Tokyo.  With a little help from the world wide net I was able to settle in on both legs of the trip. The down side of things here in the states is that if you want to get there on time with the international date line, you need to leave on Thanks Giving day in order to be there. Not that I’m a huge turkey fan, but this would mean for me two years in a row I was missing out on the family time. The last year I was wrapped up in completing samples for the Kid Rock collaboration art for Harley-Davidson.  

So with my backpack and camera bag packed I headed once again to DTW in the early hours of the morning. Once near the airport the snow began to fall more rapidly and I started to fear that my flight would be canceled. Luckily with some deicing of the flaps, we were only delayed 30 minutes from takeoff with about 5 hours in the air to LAX. Basically with the narrow timeframe of a layover to begin with and the snow delay in Detroit I basically walked off one plane and straight onto the next for another 12 hours of flying. Yeehaw....

After all the immigration and stops along the way of entering a new country I was able to meet up with John nearly where we projected and it was off to Yokohama. I was able to get a proper meal after about 24 hours of travel at this point in an ‘English Style’ Pub and a nightcap to send me into slumberland.  Rest was needed to what was about to happen.

The following day was set-up for the event which I was really only there for moral support and to snap some photos of the place without tons of people around. From about 7am to 10am we where there and then quickly John, Max Grundy and his buddy Pat and myself were headed right back to Tokyo for the day.

We were certainly out of place everywhere we went: loud americans in the subways. I recall how many Japanese were staring at Max’s beard over there, not to say it’s not an impressive beard mind you, but it was as if he was wearing a ski mask to them the way they’d stared. I guess I forget that here in the states, and more specifically in Detroit that we have a pretty diverse culture and mix of people from all over, so I don’t think anyone here stares as much. 

So we went all over in some pretty dense shopping districts. The funny thing was when I was in Japan 6-7 years ago, I’d been to this same Tokyo mall shopping for toys with my buddy Dave. I had a little bit of deja vu, or it could have been the jet lag. As it began to get dark, it was time to head back and rest. I have no idea how many miles we’d walked around through these different shopping districts, but I was feeling it for sure. I felt I was dreaming standing up at a certain point while in Tower Records. Time for sleep: tomorrow was December and Mooneyes!

December 1st kicks off with a bang! In Japan for one of the greatest Hotrod and Custom shows known around the globe. The short cab ride in unveiled some of what was about to shown on the floor with Custom Cars and Motorcycles on the approach. John and I had arrived about 2 hours before it was open to the public. This was a great chance to photograph the show unencumbered by a few thousand onlookers. The “Hero” pass was the only way to fly for sure. The only downside of this was a lot of the set up was still going on: No lights up yet and carpeting was still covered in plastic to keep it fresh. Never the less I’m thankful for the time to be able to shoot without too many people around. 

One thing of note that many folks don’t realize in the states is that its difficult for people abroad to purchase, upkeep, customize and maintain hotrods and customs, especially in Japan where space is at a premium! I’d detailed more about this when I was overseas a couple of years back at Final War in Germany: http://car-n-art.blogspot.com/2011/09/american-at-war.html In the past from what I understand, Mooneyes Yokohama used to ship over select Hotrods and Customs from the states in Shipping containers for the show. As years have gone on, the number of shipping containers has been reduced and not only from the stand point of ‘bang for the buck’ but also as trends change, more motorcycles came over than cars. A heavy presents of the Born-Free builders bikes were on display alongside of the builders booths as well. As for the cars, there were a handful of noteworthy vehicles I saw, but many of the Japanese plated cars were ones that were previously built in the USA and shipped over on an ebay deal. So, if you paid attention to west coast shows and magazines, chances are you’ve already seen many of the vehicles on display at Mooneyes Yokohama.

The motorcycles were really the stars of the show (sorry, car guys). Japan has been noteworthy of building some bad ass bikes for sometime from old american steel. I don’t think I’ve seen more vintage Knuckleheads, Panheads, Shovelheads. Flatheads,  Ironheads and even Evo and big twins under one roof, in one day. Not to leave out vintage Indians, Triumphs,  Hondas, Yamahas, Royal Enfield and weird/rare stuff in between. It was jaw dropping: any which direction you turned there was something new and unique to look at! As the show progressed and became more and more congested with patrons, I found myself feeling a little claustrophobic and wanting to see the sun and breath the air (I get a little antsy around big crowds). When I went outside there was an endless stream of vintage bikes still pulling into the show hours after it began. Where were they going? This show couldn’t possibly fit any more bikes inside these 4 walls!

I got chatting for a bit with Jenny from Trophy Queen about it and she tipped off this newb to what was going on. Apparently there are some strict rules to vehicles being shown multiple times. So many of the bikes that had previously been seen inside the convention center in the past were still at the show, just parked in the underground structure outside. So I again grabbed my camera and headed out to see the spectacle, and I don’t tend to use that word lightly either. I was again jaw dropping inside of this parking structure: Wall to wall badass bikes, crammed in like sardines underground. I was again completely overwhelmed by the bikes!

Soon enough it was time for judging and that meant the show was nearly over. John began his battle cry of ‘Hangaku!’ (or half price/amount) and it was time to start packing it in as we had to shuttle off to Tokyo right after the show. Breakdown only took a short 20-30 minutes and we had a little hike to the rail station with a few switches along the way to check in at the Hostel in Tokyo’s used book district.  John’s friend Nory was a  huge help at the booth and escorted us to the hotel and then for a quick bite to eat.

The following day there were no slowdowns.  I had spoke with a representative from H-D Japan while at the 110th about a potential project on the horizon so I had a meeting with them midday (sorry, no details here I can share) also in the mix was the wholesale district areas with John looking at new and vintage toys alike. But after all the work was done, I was stoked to see something I won’t surely forget anytime soon: Robot Restaurant.

My good friends Roger and Abbie mentioned this Anthony Bourdain show where he’d visited Japan and went to this ‘crazy-ass restaurant with dancing girls, tanks and robots.’ Say no-more my friends, just tell me where to go!  With a little investigation I was able to get the name and website for this Amazing Spectacle! (hey look, there again, two words I won’t use unless I truly mean it) I don’t want to give too much away for some day you may find yourself in Tokyo, Japan... and when you are, you MUST head to the red-light district and sit in the front row of this mind-blowing dinner show. It’s rumored this area is run by the Yakuza: The organized crime syndicate (or mob) and after being there, I can say I saw it with my own eyes: missing fingers and visible tattoos are the telltales here, besides being solicited for sex in route to the location a few times with guys with ‘menus’ of women. So, you’ve been forewarned.


Waking the morning of the 3rd of December I was in a bit of a daze. I think I’d run like I did so many years prior like in college. I was only focused on packing my clothes up and getting caught up online as to what’s been happening back home with the help of a wifi connection. My flight was on time so that was the good/important news. Immediately I was updated with a tag on instagram push notification that I was tagged in a post. I knew some time back I was able to complete an online interview with Smokin’ Shutdown magazine out of Berlin, but what I didn’t know was that this interview was to be printed in a full color, 248 page hardcover book! I’m stoked to be featured and as I write this blog, my copies are in transit from Germany. 

With no rest for the weary, I returned home to jump straight back into work mode on a couple of projects as well as some holiday orders to fulfill. Finally catching my breath for a moment, I wanted to sit down and finally detail some of my year in review. Knowing the year isn’t really over yet, I still wanted write something as I used to enjoy taking the time to write something, and now with adding Father to my list of things to do, I simply just don’t find the opportunities as I did in the past.

I hear when you get ready to die, your life can flash before your eyes (probably the good with the bad) but what I know is 2013 will definitely be in the highlights and I’ll look back at that ‘unlucky ’13’ very fondly.  Special thanks to many folks out there who made this especially ‘lucky’ for me: Wendy & Cass, Mom & Dad, Roger & Abbie, Mike & Jenny, John & Kim, Mel, Dino, Annie, Jack, Michelle, Tyler, Thom, Paul, Willie, Karen, Bill and many more!